Create an At Need Case from a Pre Need Case
There are two methods to perform a PN to AN conversion in MIS Professional:
- "Convert to AN" button on the Case Search widget
- First Call: Preneed Information section
Case Search widget: Convert to AN button
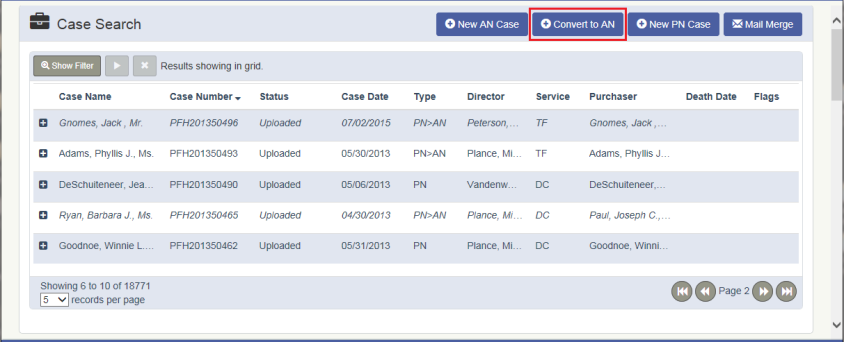
- From the Case Search widget, search for and select the Pre Need case to be converted to At Need
- The Pre Need case must be Uploaded, Posted and the Decedent name can not exist on as a deceased on another case.
- Click the "Convert to AN" button
- Click YES to the "Convert to AN" confirmation message prompt
- The "PN Go AN" screen appears, fill in the Required fields:
- Required Fields: Facility, Call Taken, and Decedent
- Optional Fields: Date of Birth and Death of Death
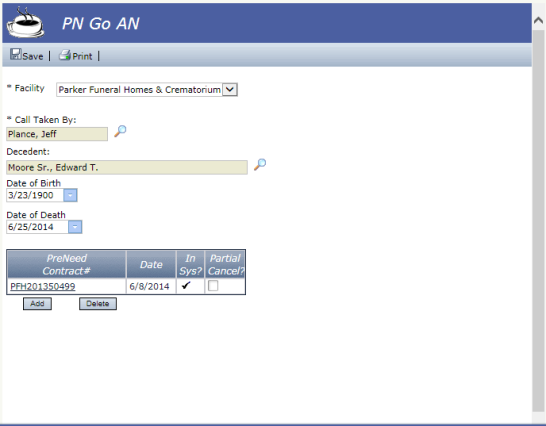
- Click Save
- Complete the First Call screen
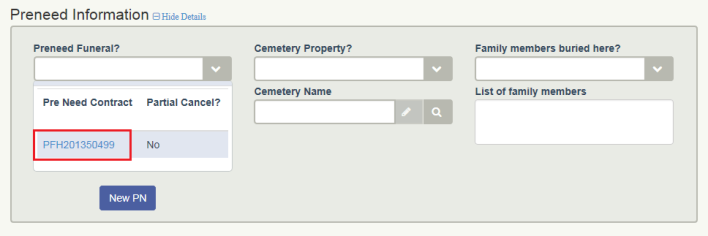
- Note that the Preneed Information section shows the Pre Need Contract number
First Call: Preneed Information section
The following steps are for a new AN case, however these steps can be performed on a new case as well as an existing case.
New Case:
- Click the "New AN Case" button on the Case Search widget
- The First Call screen opens
- Fill in the Required fields
- Facility, Call Taken By, and Decedent
- Fill in the Purchaser Name and relationship
- Click Save
- Scroll to the Preneed Information section
- Click the "New PN" button
- The PN go AN screen opens
- Fill in the required fields: Facility, Call Taken By, and Decedent
- Click Add
- Search for and select the PN case to convert to AN
- Click Save
- You are returned to the First Call screen
- Complete other first call details for the case and click Save
- Note that the Preneed Information section shows the Pre Need Contract number
Notes:
- Previous to Version 13.2, only case persons, having a role assigned (Cases > Case People & Relationships: Case Person Information) would be brought over from the Pre Need Case to the At Need Case.
- With Version 13.2, all Case Persons, whether a role is assigned or not (Cases > Case People & Relationships: Case Person Information & Other Relationship Information), are brought over from the Pre Need Case to the At Need Case.
- Case Person information will be reflected on the Case People & Relationships screen and the Case Summary's Case People Widget.